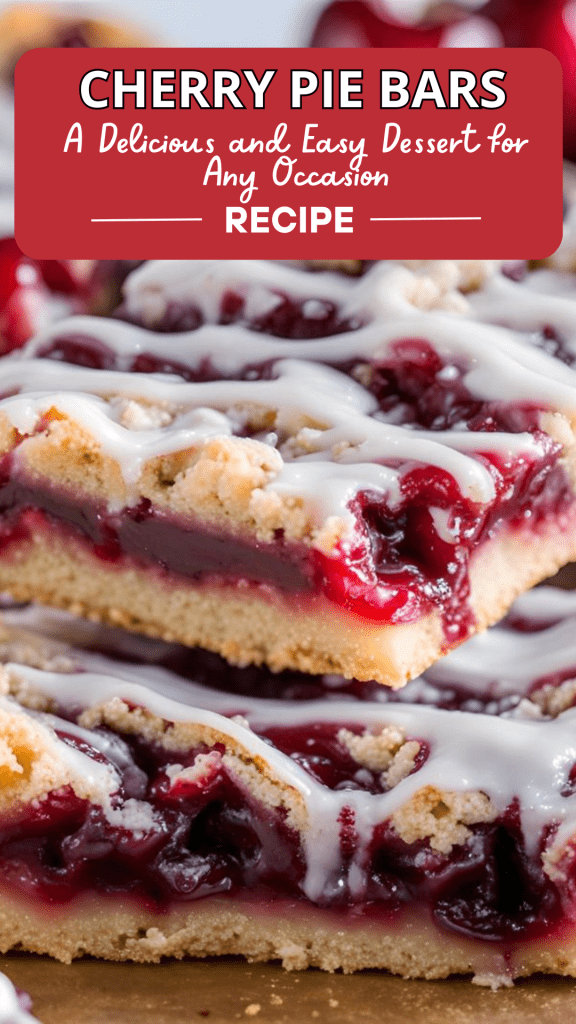
Welcome to our guide on making Cherry Pie Bars, a delightful treat that brings back warm memories of summer gatherings and family picnics.
As a musician who loves to spend time in the kitchen, I’ve found that creating these bars is like composing a sweet symphony of flavors. Let me share with you my favorite recipe, perfected over many baking sessions with my daughter by my side.
Ingredients and Quantities
Before we dive into the baking process, let’s gather our ingredients. Just like preparing for a concert, having everything ready makes the experience so much smoother.
For the Shortbread Crust
- 2 cups all-purpose flour
- 1 teaspoon baking soda
- 1/4 teaspoon salt
- 2 sticks (16 tablespoons) unsalted butter, melted and slightly cooled
- 1/2 cup white sugar
- 1 large egg, room temperature
- 2 teaspoons almond extract
- 3 tablespoons cream
For the Cherry Filling
- 4-5 cups Homemade Cherry Pie Filling (or store-bought cherry pie filling)
For the Optional Glaze
- 1 cup powdered sugar
- 1 tablespoon milk
- 1/2 teaspoon almond extract
How to Make Cherry Pie Bars
Preparing the Shortbread Crust
1. Preheat and Prepare the Pan: Start by preheating your oven to 350°F. Line an 8×8-inch or 9×13-inch baking dish with parchment paper, ensuring it covers the bottom and sides. This reminds me of setting up the stage before a performance – everything needs to be just right.
2. Mix Dry Ingredients: In a separate bowl, sift together the flour, baking soda, and salt. This step is crucial for a smooth texture, much like tuning instruments before playing.
3. Combine Wet Ingredients: In another bowl, mix the melted butter, white sugar, egg, almond extract, and cream. The aroma at this stage always reminds me of my grandmother’s kitchen.
4. Combine Wet and Dry Ingredients: Gradually add the dry ingredients to the wet ones, mixing until you have a soft dough. This process is like blending different musical notes to create a harmonious melody.
Assembling and Baking the Bars
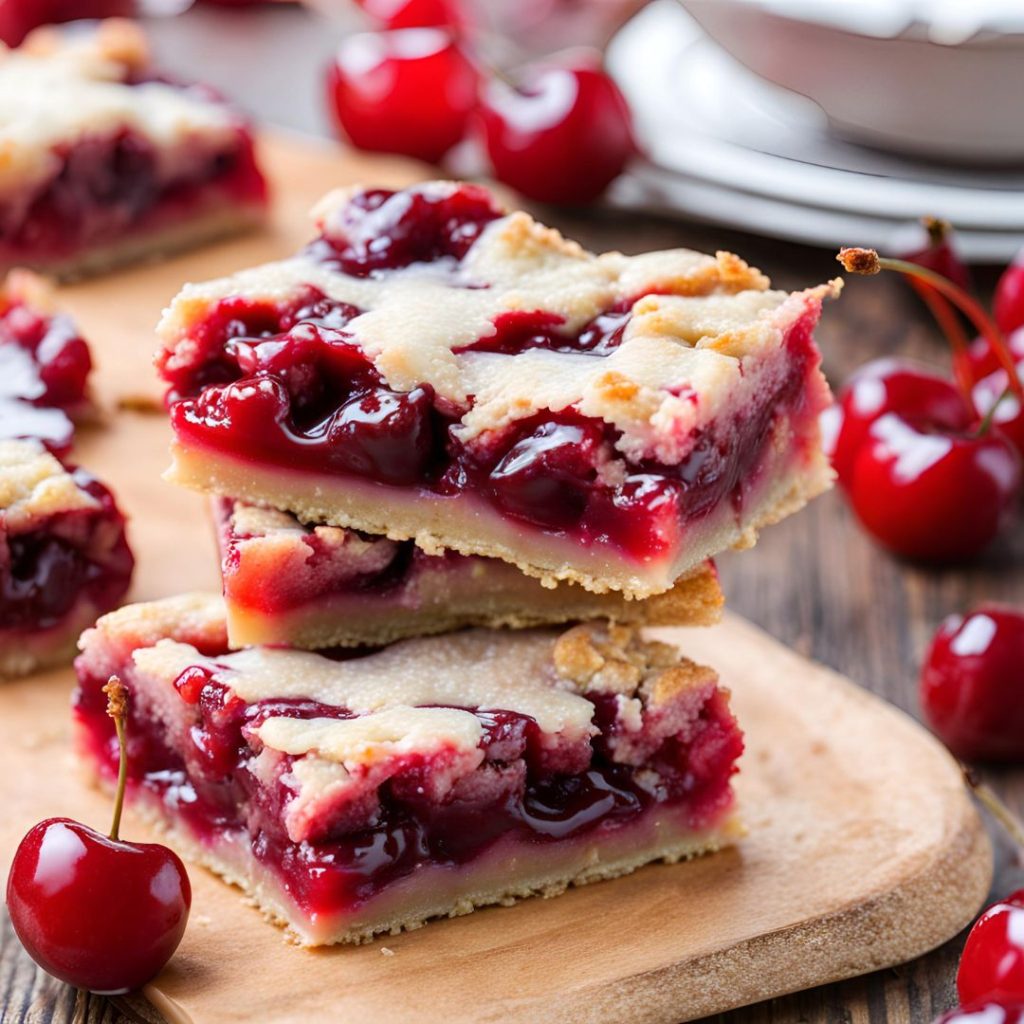
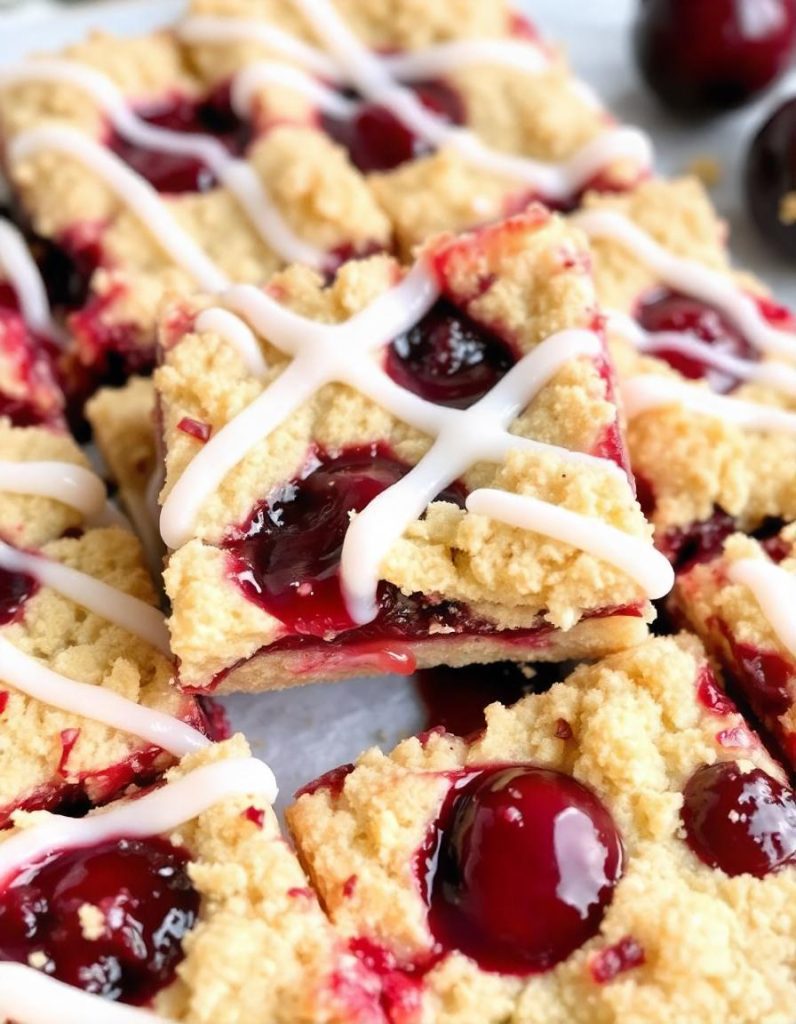
1. Press the Crust: Take about 2/3 of the dough and press it into the prepared baking dish. This forms the base of our cherry symphony.
2. Add Cherry Filling: Spread the cherry pie filling evenly over the crust. The vibrant red color always reminds me of the passion we put into our music.
3. Top with Remaining Dough: Drop spoonfuls of the remaining dough over the cherry filling. Let some of the filling peek through – it’s like adding those perfect high notes to a composition.
4. Bake: Bake for 35-45 minutes or until the crust turns golden brown and the center is set. The aroma filling the house is my favorite part, reminding me of lazy Sunday afternoons with family.
Tips and Variations
Over the years, I’ve experimented with different variations, much like improvising in jazz. Here are some ideas to inspire your own culinary creativity:
Using Different Pie Fillings
Try blueberry pie filling for a sweet and fruity alternative. It reminds me of the wild blueberries we used to pick during our nature walks. Raspberry filling adds a tart and refreshing flavor, perfect for summer gatherings. For a taste of spring, strawberry pie filling is sweet and juicy, bringing back memories of strawberry picking with my daughter.
Adding a Streusel Topping
For an extra layer of texture, consider adding a streusel topping. Mix together flour, granulated sugar, cold butter, and ground cinnamon. Sprinkle this mixture over the cherry filling before baking for a delightful crunch. It’s like adding a percussive element to our cherry pie bar composition.
Glazing the Bars
The almond glaze is optional but highly recommended. Whisk together powdered sugar, milk, and almond extract to create a sweet drizzle. This final touch is like the crescendo in a musical piece, bringing all the flavors together beautifully.
Storing Cherry Pie Bars
Room Temperature and Fridge
For short-term storage, keep the bars tightly wrapped at room temperature for up to a day. If you want them to last longer, store them in the fridge for up to 5 days. This reminds me of preserving sheet music – proper storage keeps the magic alive for future enjoyment.
Freezing
For long-term storage, slice the bars, wrap them in parchment or wax paper, and store in an airtight container or freezer bag. They can be frozen for up to a month, ready to be thawed for unexpected guests or late-night cravings.
Serving Suggestions
Room Temperature
Enjoy the bars at room temperature for a simple dessert. It’s perfect for picnics or outdoor concerts – a sweet treat to complement the music and nature.
Warmed with Ice Cream
For an indulgent treat, warm the bars slightly and top with a scoop of vanilla ice cream. The contrast of warm bar and cold ice cream is like a beautiful duet of flavors.
Chilled
On hot summer days, chill the bars in the fridge before serving for a refreshing dessert. It’s like a cool interlude in a lively symphony.
Final Thoughts
Creating these Cherry Pie Bars is more than just baking – it’s about crafting memories. As I make these with my daughter, I’m reminded of the times I spent in the kitchen with my own grandmother. The process of mixing, baking, and sharing is a beautiful way to connect generations through food.
Whether you’re preparing for a family gathering, a potluck with friends, or simply want to fill your home with the comforting aroma of baked cherries, this recipe is sure to hit all the right notes. So, preheat that oven, gather your ingredients, and let’s create some sweet memories together. After all, the best recipes, like the best music, are meant to be shared and enjoyed with those we love.